Wednesday, September 21, 2011

Hunger Challenge Recipes: Quesadillas

The hunger challenge keeps rolling on. There's not a whole lot I truly feel is missing from my diet, but the requirement to stick to whatever plan I created during the week creates a small sense of panic everytime I feel my stomach growl or someone else is helping me eat my food. Snacking really can't happen right now. If I eat between meals I'm eating something meant for a meal. I don't normally do a ton of snacking, but I'm learning I do enough that it makes a difference when it can't happen.

I miss tea. And I miss butter.

Despite my culinary longings, there are a couple of non-chili dishes I've whipped up this week. The quesadillas I made were good, though turned out to be less than ideal from a cost perspective. I wish I'd had some protein in there other than the cheese. I'd imagine if a can of black beans were tossed into the mix, they'd be a bit more on target. The zucchini and corn cakes hit the spot from both a taste perspective and price point. I found a couple of vendors at the farmers' market that had oversized zucchini being sold very inexpensively, so I snagged one for the cakes. It uses shredded zucchini so the baseball bat-sized ones that don't really taste good on their own work perfectly.

Stay tuned for the zucchini cake recipe. In the meantime, here's a recipe for relatively cost-effective and healthy quesadillas.


Hunger Challenge Quesadillas
Serves 3 as a meal, 6 as a side
20 minutes
Cost per serving, $1.76 as a meal, .88 as a side

Ingredients:
  • 2 Tbsp. vegetable oil
  • 2 large bell peppers, diced
  • 1/2 cup shredded zucchini
  • 1/2 onion, diced
  • 6 burrito-sized flour tortillas
  • 2 cups mozzarella cheese
  1. Heat 1 Tbsp. of oil in a skillet over medium heat. Sautee the peppers and onion for 5 minutes.
  2. Stir in zucchini and allow to cook for an additional two minutes.
  3. Remove the skillet from heat and set set vegetables aside in a separate bowl.
  4. Place the skillet back on the stove over medium heat with 1 tsp. of the remaining oil.
  5. Prepare the quesadillas by adding just over 1/3 cup of the vegetable mix off center to one side of the tortilla. Sprinkle 1/3 cup of cheese over top of the veggies and around the veggies. Press the opposite side of the tortilla over to fold it in half.
  6. Place the assembled quesadilla in the skillet and cook for 1-2 minutes. Flip and cook on the other side.
  7. Repeat steps 4-6 for the remaining tortillas.
Tips and Tricks:
  • Utilize a non-stick skillet, especially if you're limiting the amount of oil you're using. This can help prevent the tortilla from getting stuck or ripping.
  • If the folding technique isn't working for you, you can use two tortillas laid out on top of one another and double the filling and cheese you use.
  • You can use any combination of veggies you'd like! They should measure out to be between 2 and 2 1/2 cups total.  
  • I served mine with plain yogurt and salsa on the side, adding about 30 cents to the cost of each meal serving.
  • If you want to make this a more complete meal on its own or get a more filling portion from just one quesadilla, add in 1 can of drained black beans when you put the vegetables in a bowl. This will increase the cost to around 2.09 a meal serving, but because of the added calories and fiber, you wouldn't need to eat as much to feel full.


Tuesday, September 20, 2011

Three Days In with Chili and Cornbread

Three days in. Faring pretty well so far and quite proud that I have five whole cents left over for the week. Though, now, I quite literally do not have two dimes to rub together. Somewhere my mother and her repertoire of folksy expressions are having a good chuckle about that at my expense.

To kick off the Hunger Challenge, I cooked the cheapest thing I know how to make: chili. First, let me say that chili is no where near as cheap as I thought it was (not that I had a dollar amount in mind, but I balked at the extra quarter for chili beans versus black beans). Regardless of my inaccurate perceptions of the cost of chili, this meal can easily be made and served for around a dollar a serving. Now, I am well aware dried beans are a cheaper (and healthier, from the perspective of preservatives) than canned beans, but I was making the chili shortly after I was shopping, so soaking time for the beans wasn't an option. Food stamp recipient or not, sometime there just aren't enough hours in the day to make a recipe as nutritionally ideal as possible.

There's not much of a difference here from how I normally make the chili except that I use more beans and more TVP and use tomato juice instead of sauce and water. Marsh had a BOGO sale on their house brand canned tomato products, so going with the sauce and water was far cheaper than the juice. I needed the extra dollar I would have spent on more beans for something else on the grocery list. As far as the TVP goes, it was the last thing I bought this week and I literally bought all I could afford. All 27 cents worth (about 3/4 cup).

What is TVP you ask? TVP or Textured Vegetable Protein is essentially soy after the oil has been extracted. If that eeks you out a little, I'll let you know you've almost certainly eaten TVP at some point in your life. Imitation bacon bits? Flavored TVP. Some school cafeterias use it as a cheaper, safer (from food borne illnesses), leaner, and a longer-lasting alternative to meats. It comes in lots of shapes and sizes and is available in flavored varieties, though, some of the health advantages over meat go away with those additives. Bottom line, TVP is far cheaper pound-for-pound than any kind of ground meat I would put in chili.

The downside of this recipe is the sodium content. With all of the canned goods, it is through the roof for something that's a standard recipe for me. The best way to reduce the sodium content is to use dried beans in place of canned ones. In the interest of time, I opt to keep the canned beans. If you are concerned about sodium, be sure to make this during a week where you'll be making other recipes utilizing more fresh ingredients.

I am three days in to the challenge. And pretty much all I've eaten is chili. This was a gross oversight on my part. Normally I'm really good at planning meals and spreading out my leftovers, but I somehow with the distraction of a tight budget, I didn't notice I planned chili for Sunday dinner, Monday lunch, Monday dinner and Tuesday lunch. Suffice it to say while I love chili, I won't be terribly sad to see it exit the meal rotation for a little while. I can't fool anyone. I love fall. And fall means chili. And the weather these past few days has been terribly suitable for warm comfort food around the clock. I don't mind that chili has been on repeat.


Hunger Challenge Chili and Cornbread
Cost per serving, $1.07
Makes 6 servings (1 1/2 cup chili and 2 corn muffins)

2 Tbsp. olive oil
3 cloves garlic, minced
1/2 onion, diced
1 28 oz. can diced tomatoes
1 28 oz. can tomato sauce
1-4 cups water
3/4 cup TVP
1 regular can chili beans
1 regular can black beans, drained
1 regular can kidney beans. drained
2 1/2 Tbsp. chili powder
2 tsp. cumin
1 tsp. coriander
1 tsp. salt
1 tsp. crushed red pepper
1/4 tsp. cayenne pepper
  1. In a large stockpot, heat the olive oil over medium heat.
  2. Add in the garlic and onion and sauté for 3-5 minutes, or until onions start to become translucent.
  3. Add in the tomatoes, tomato sauce, 1 cup of water and the TVP. Bring to a boil.
  4. Reduce to a simmer and add in the beans and spices and stir to ensure it is well combined. Taste and adjust spices if necessary.
  5. Add additional water if the chili is thicker than you would like, up to three cups.
  6. Continue to simmer on low heat for at least 30 minutes.
Tips and Tricks
  • If you add additional water at step 5, be sure to taste again and make sure the flavor is still right. Adding water may dilute the spices you've put in.
  • Serve with Jiffy Cornbread made according to package directions. For extra crispy-edged cornbread, bake it in a greased casserole dish or (the best way) a cast iron skillet instead of muffin tins.
  • Tomato sauce and water can be swapped out for tomato juice. 
  • 1 packet of chili seasoning is a suitable substitute for the spice mixture listed here, if you have that option.

Sunday, September 18, 2011

Hunger Challenge 2011, Week One - Prep and Predictions

The Hunger Challenge starts today! Beginning with tonight's supper, I'll be eating on a food stamp budget of $4.46 per day for the next month. You can read all about why and get all the details of the challenge here.

I feel like I'm operating at a bit of an unfair advantage because the official San Francisco Food Bank Hunger Challenge ended this week. I've got loads of blogs, tweets and emails full of trials, tribulations and best practices of fellow food challengers. After reading them over the weekend these are the major points I took away:

  • I'm extremely thankful I'm only responsible for feeding myself.
  • Exercise seemed to be a concern for some because it made them hungrier.
  • I think 32% of food made by food challengers this week was pasta and red sauce.
  • Fresh roasted, local coffee. I shall miss thee. You are so out of my price range.
  • I've never been happier that I don't drink soda regularly.
  • I am determined to not perpetuate boring meals, if I can help it.
There are a few rules of engagement. All of my "extra" kitchen appliances and implements are off limits. The kitchen aid mixer, food processor, immersion blender, etc. are items that will be collecting dust for the next 30 days because it isn't reasonable to expect all of those items to be in everyone's kitchens. The only existing food items in my kitchen I'm able to use are ketchup, mustard and mayo as condiments. Any spices I use from my own stock will be prorated at their bulk price. I could be buying them straight from bulk bins, but am opting to use up what I have.

I'm predicting a few things will happen over the next four weeks:

  • Nutritionally, I think my sodium intake will go up considerably based on the amount of canned items that will replace fresh.
  • As far as calorie sources, I think my carbohydrate intake will increase, fat will go down, and protein will remain relatively the same. 
  • I will spend more time at the store when I grocery shop to ensure I'm picking the right items and getting the best value.
  • My mental math skills will increase exponentially.
  • I will have to pass up opportunities to provide food for something or dine with friends.
  • Whenever The Vegetarian is over for dinner I will watch him like a hawk to make sure he doesn't eat too much of my food. I am certain he will love this. 
  • I will surely screw up at least one recipe and wish I could just order a pizza instead of deal with the ick I just managed to cook. 
  • I will desperately miss fresh roasted coffee.
  • At least one of my normal grocery shopping tendencies from before the experiment will be determined unnecessary. But not the coffee.

I did all my shopping yesterday with six cents to spare. Here's the rundown:


About half is fruits and vegetables. Some not as fresh as I'd usually get (but there was a buy 1 get 2 sale on the baby carrots and lettuce...how was I not buying those?), but overall, not too different from a normal grocery haul. Of the other half of the groceries, protein and dairy made up the majority with coffee, oil and spices rounding out the spread.

The menu for this week is chili and cornbread, zucchini fritters, quesadillas and zucchini with pasta.

Stay tuned for this week's recipes. I'll be posting them throughout the week along with information on price. Food stamps or not, I'm confident there will be some great cheap eats on the site over the next month.

Saturday, September 17, 2011

The Facebook Page is Up and Running

Like Spoonful of Something on Facebook!


Friday, September 9, 2011

Hunger Challenge 2011

Every September the San Francisco food bank sponsors a hunger challenge that charges participants with a single task: eat on a food stamp budget for one week. Last year, that amount was four dollars a day, or 28 dollars for the entire week.

When I first learned of this concept, I was intrigued. Frankly, a food budget of four dollars a day didn't sound all that hard. It wasn't until I really gave it some thought that I realized what a challenge this could be. I quickly figured out two things. First, eating cheap for a week has its difficulties, but a month would truly force one to figure out how to make a food stamp budget work. Second, I realized that while four dollars a day didn't seem too low a sum, for me it would be a 24% reduction in my grocery budget every month.

With that, I decided to take on this challenge and for a month, eat exclusively on an Indiana food stamp budget of $4.46 a month.

Why?

I am passionate about food and cooking. The way I see it, everyone needs to eat and usually more than once a day. Why not enjoy what could ordinarily be a chore? Why not be immensely satisfied with what could otherwise be mediocre? I can think of no other single experience in our culture that brings people together the way food does. There's nothing I love more than preparing a meal and enjoying it with the people I love.

But that attitude is a bit of a luxury. I have been significantly blessed never having to wonder where my next meal will come from.  For me, meals are an opportunity to be focused and expressive. To experiment and enjoy. My kitchen is one of the places I find incredibly relaxing. However, my attitude would surely be different if instead meals were a reminder of my struggle and an illustration of insufficiency.

So can I, an innovative and creative culinary mind, bridge this gap for 30 days? The tastes and tendencies of a foodie on a food stamp budget. Surely it's possible to eat for less than $4.50 a day. But for now, I can't say how my taste buds, health and spirit will fare.

My goal? To come away with this for an appreciation for what food and cooking are like for a different segment of the population. To understand what is different, what is the same and how I can channel a passion like mine to do more than just make good food.

Check out the San Francisco Food Bank's challenge here. You'll notice their official challenge kicks off this Sunday. I will be kicking off my own month-long challenge a week from tomorrow. I'll be keeping an update on the blog of what I'm cooking and eating and faring overall.

You can probably look forward to some cheap eats recipes being added soon!

Monday, September 5, 2011

Recipe: Sugar Cookies and Decorator Frosting

Check out the new look of Spoonful of Something! In an effort to make the content more organized and the site more user-friendly, it got a facelift over the long weekend. You can look forward to lots of new content in the coming weeks and months, including 30-day challenges that I am very excited to get underway!

As you look around at the new organization and content, let me know if there are any recipes or tutorials you'd like to see. I'm in the process of lining up content for the next few months and would love ideas from readers.

Another exciting development this week? The designed draft of Project Cookbook is completed! I'll be reviewing it over the next couple of days and then we're off to print! I can't wait to share it with you all!

Speaking of Project Cookbook, here's another Project Cookbook recipe I want to share with you all. Specifically at the request of my friend Marsha, here is my mother's recipe for decorated sugar cookies. You can guarantee there will be massive platters of these babies (beautifully decorated, I might add) every Christmas at the Meade household. If you have a favorite set of cookie cutters, this is the recipe you'll want to use it for. Enjoy!

Platter of cookies for a Project Cookbook shoot


For the cookies:

8 hours, 30 minutes (8 hours inactive)
Makes approx. 5-6 dozen cookies
From Mom’s Kitchen

Ingredients:
  • 5 cups flour
  • 4 tsp. baking powder
  • ¼ tsp. nutmeg
  • 1 cup butter
  • 2 cups sugar
  • 2 tsp. vanilla
  • 4 eggs
  • 2 tbsp. cream
  • ½ tsp. lemon rind

1.   Sift flour, baking powder and nutmeg together.
2.   With an electric stand mixer or hand mixer, beat butter until creamy and gradually add sugar. Beat in vanilla, eggs, cream and lemon rind.
3.   Add in dry ingredients and beat until combined.
4.   Chill dough for 8 hours.
5.   Preheat oven to 400 degrees. Remove dough from the fridge and roll out on to a floured surface.
6.   Use a cookie cutter to stamp out shapes and transfer to a greased cookie sheet, then bake for 10 minutes or until cookies are firm but still pale.
7.   Transfer to a wire rack and allow to cool.

Tips and Tricks:
  1. Allow cookies to cool completely before frosting.


For the decorator frosting:

10 minutes
Makes enough to frost one 9x13 cake
From Mom’s Kitchen

Ingredients:
  • ½ cup shortening
  • ¼ cup milk
  • ½ tsp. vanilla
  • 1 tsp. clear corn syrup
  • 1/8 tsp salt
  • 3 ½ cups powdered sugar

1.   Using an electric mixer, beat shortening and milk until combined (this may take several minutes).
2.   Add in vanilla, corn syrup and salt. Beat the powdered sugar in one cup at a time.
3.   After the last cup of powdered sugar is added, turn off mixer, scrape the sides of the bowl and beat until combined. Do not beat for longer than three minutes.

Tips and Tricks:
  1. If you are frosting and decorating a cake, make a double batch. If you don’t have a very large bowl, make the double batch one recipe at a time.
  2. When adding food coloring, add one or two drops at a time. It is easier to darken a hue than try and fix it after you have added too much color.

Monday, August 29, 2011

Recipe: Banana Bread

If you're like me and keep bananas around on a regular basis (but are the only person responsible for eating them), you inevitably hit that phase where you're having to devour three a day to keep them from getting too ripe.

You don't have to go on a potassium binge. Make banana bread! Or banana pancakes. Or any of the many possibilities that allow you to use up overripe bananas.

If you have overripe fruit but can't use it right away, you can put it in the fridge for a couple of days. The peel will turn almost black, but the fruit inside is ok - it will continue to ripen very slowly.  If you don't have enough fruit for a recipe, mash the bananas and toss them in the freezer to use when you have more. If you do this, the outside layer of the mashed bananas will turn brownish from oxidization, but it tastes perfectly fine in the bread. Just stir it up and no one is the wiser!

Sunday, August 21, 2011

Recipe: Chipotle Tostadas

First, a hugely important (for me, anyway) announcement: Project cookbook is out of my hands!! It has been completely written, edited and photographed and is now being designed and laid out by my wildly talented friend, Holly. 

In celebration of this project being so very close to a printed version, I'll be sharing all of the recipes from it (that aren't already on the blog) over the next couple of weeks. I hadn't wanted to post them all here while the book was still in production to make sure some of it was still a surprise for my sister. Miss Kathleen is 7 days away from her birthday (not that she's counting...) and shortly after that she will have a hard copy of this little project. 

A few weeks ago, I came across this recipe on Taste Spotting. It was one of those that you see and cannot wait to work into a meal rotation. I hoped it might be one I could add to the cookbook because it seemed very fit for Kathleen. Simple, spicy and no "funky" vegetables! I made it for her when she visited a few weeks ago and we both absolutely loved it. 

I served these topped with queso fresco and Greek yogurt and a side of caramelized corn and black beans. Try swapping this out for your usual recipe next time you have a taco night!


Chipotle Tostadas
35 minutes, 15 minutes unatteded
Serves 4
Adapted from Vittles and Bits

Ingredients:
  • 1 large onion, diced
  • 2 cloves garlic, minced
  • 2 chicken breasts (approx. 1 lb. meat)
  • 3 cups water
  • ½ can of chipotles in adobo sauce
  • 1 regular can of diced tomatoes
  • ¼ cup vegetable oil
  • 8 corn tortillas

1.   Place half of the onion, half of the garlic, the chicken and water in a large stockpot.
2.   Bring the chicken to a boil, reduce to a simmer and cook for 20-25 minutes.
3.   While the chicken is cooking, place the remaining onion and garlic and chipotles, sauce and tomatoes into a blender and blend until mostly smooth.
4.   When the chicken is finished cooking, remove from the water and shred with a knife and fork. Drain the water from the stockpot and add the chicken back in over low heat.
5.   Toss the shredded chicken with the blended sauce.
6.   In a medium skillet, heat a teaspoon of vegetable oil over medium high heat. Cook a corn tortilla for one minute on each side. Repeat with an additional teaspoon of oil for each tortilla.
7.   Spoon the seasoned chicken over the tortillas and serve.

Tips and Tricks:
  1. You can find chipotle peppers in adobo sauce with other Mexican foods in most grocery stores. Look for a small aluminum can alongside cans of other peppers.
  2. When the chicken has finished cooking, you can reserve the cooking water and use as chicken stock.
  3. As each of the tortillas gets cooked, set aside and dab with a paper towel to remove any excess grease.
  4. Serve with toppings on the side such as queso fresco, sour cream or guacamole.


Saturday, August 13, 2011

Peaches in Fig Vinegar (and natural lighting)


Remember when I told you all about how life-altering fig vinegar is? It's back! You knew this was coming. Do you think I like making myself look like a sucker by going straight to the store I left to make a purchase I just politely turned down? I mean, I don't like it, but obviously I'm the kind of lady that does it from time to time.

The sample of the fig vinegar I initially had was with a peach and is still one of my favorite applications for it. The dressing used on these peaches was 2 Tbsp. fig vinegar to 1/4 tsp. of vanilla. It works best if you refrigerate it for a little while to let the dressing thicken a bit. I tend to think balsamic would work almost as well, though you may want a bit more vanilla to balance it out.

More importantly than the vinegar (yes, there is something more important) is the fact that I ate these during daylight hours on a sunny afternoon.  Which meant I could break free from the atrocious lighting of my kitchen and utilize natural light from my kitchen window to do this photography. When most of your cooking happens around 10 PM (Don't even ask me why I cook at that hour. I mean, it's not when I eat dinner. I am still trying to figure it out.) natural light is not an option.

Peaches are plentiful at the market these days! Grab yourself a few and top with a vinegar and vanilla mix. Hopefully you too can enjoy them with some sunshine. It kind of makes even delicious things taste better.
Check out this shine! It's all in the vinegar, people.

Pardon my filthy table and dull paring knife.
I was distracted by the foreign source of light.


Saturday, August 6, 2011

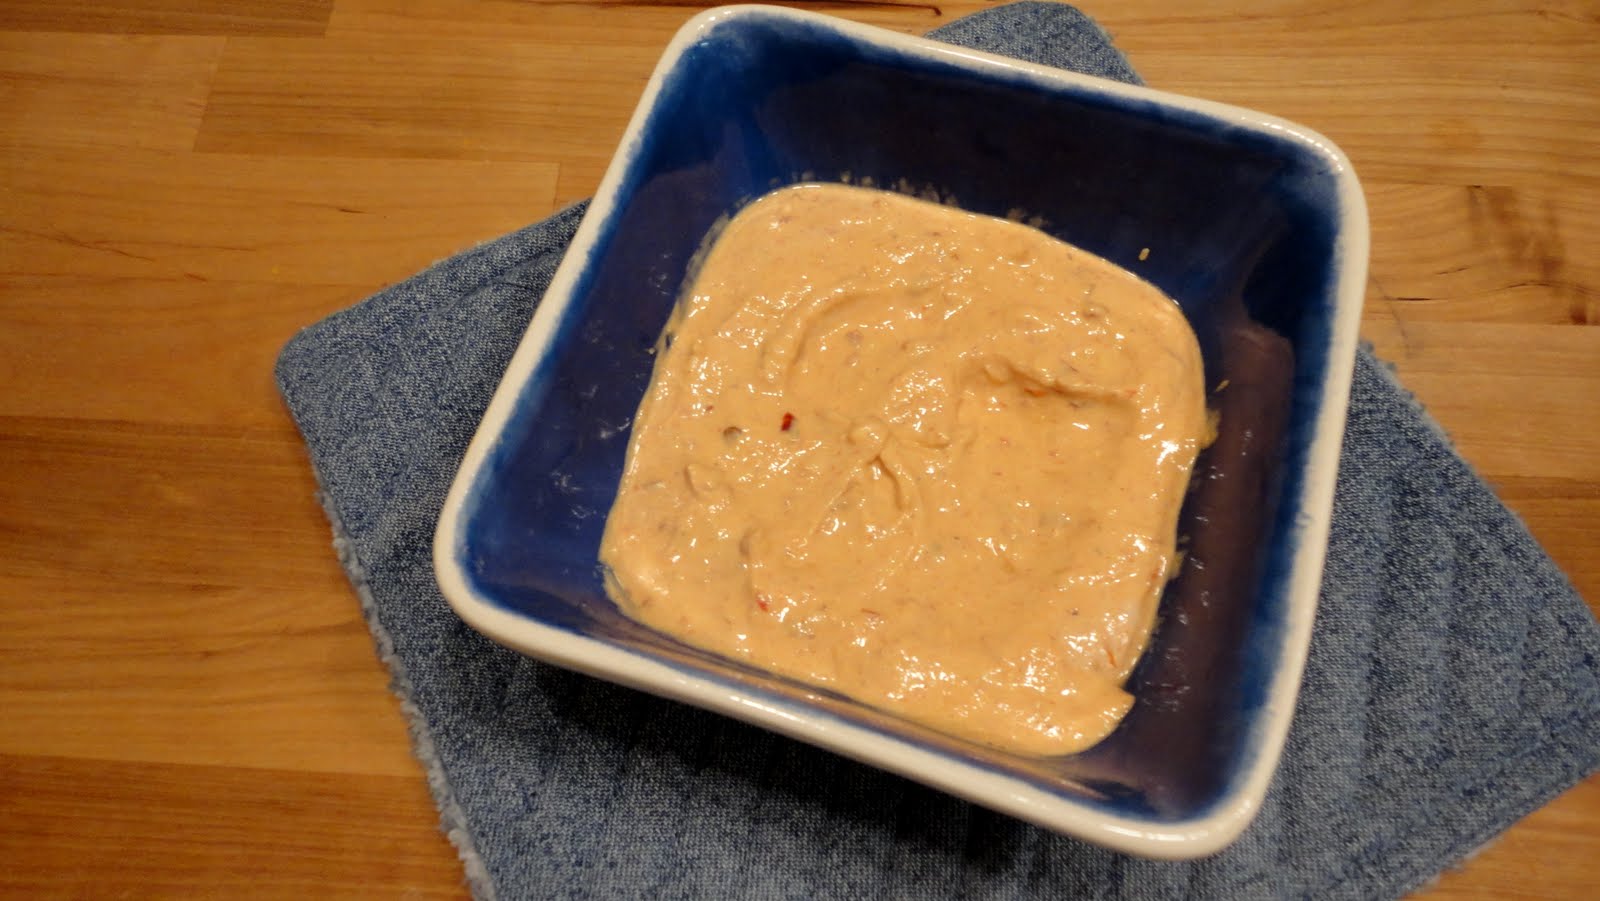
Recipe: Chipotle Yogurt

Remember this guy from way back when I put a bunch of pictures up of delicious things I promised I'd tell you how to cook?

Today is the day you get to meet chipotle yogurt. Just a word of warning, don't make this with tortilla chips in the house. Because you probably won't have any left.

This sauce is great on sandwiches, salads or as a dip. Try swapping it out for mayo whenever you'd like to save some calories and take the heat up a notch.


Chipotle Yogurt
5 minutes
Makes approx. 2 ¼ cups of yogurt

Ingredients:
  • 2/3 cup light plain cream cheese
  • 1 ½ cup greek yogurt
  • 1-3 chipotle peppers
  • 1-3 tbsp. adobo sauce

Process:
  1. Blend the cream cheese and greek yogurt together in a food processor.
  2. Add the peppers in one at a time with 1 tbsp. of the sauce, tasting in between until proper spice level is achieved.

Tips and Tricks:
  1. Where can you find chipotle peppers and adobo sauce, you ask? Check with the Mexican foods at your grocery store. You should be able to find a can of chipotle peppers in adobo sauce.
  2. Adding in the peppers and sauce one at a time will allow you better control over the spice level. 1 would be a medium, 2 would be a hot, 3 a very hot, etc. If you accidentally make it too spicy, you can balance it out a little by adding more cream cheese.

Need an idea for using the yogurt in a meal? Try this out:

Brush a pita lightly with olive oil. Place in a skillet on medium heat and sprinkle chili powder, cumin, salt and pepper on the oiled side facing up. Cook for 2-3 minutes on each side until crisped. Serve topped with black beans, sliced tomatoes, onions, lettuce and chipotle yogurt drizzled over the top.